1
Go to Fast Swaps
Open your browser and navigate to fastprotocol.io.You will see the Fast Swaps landing page with the swap interface.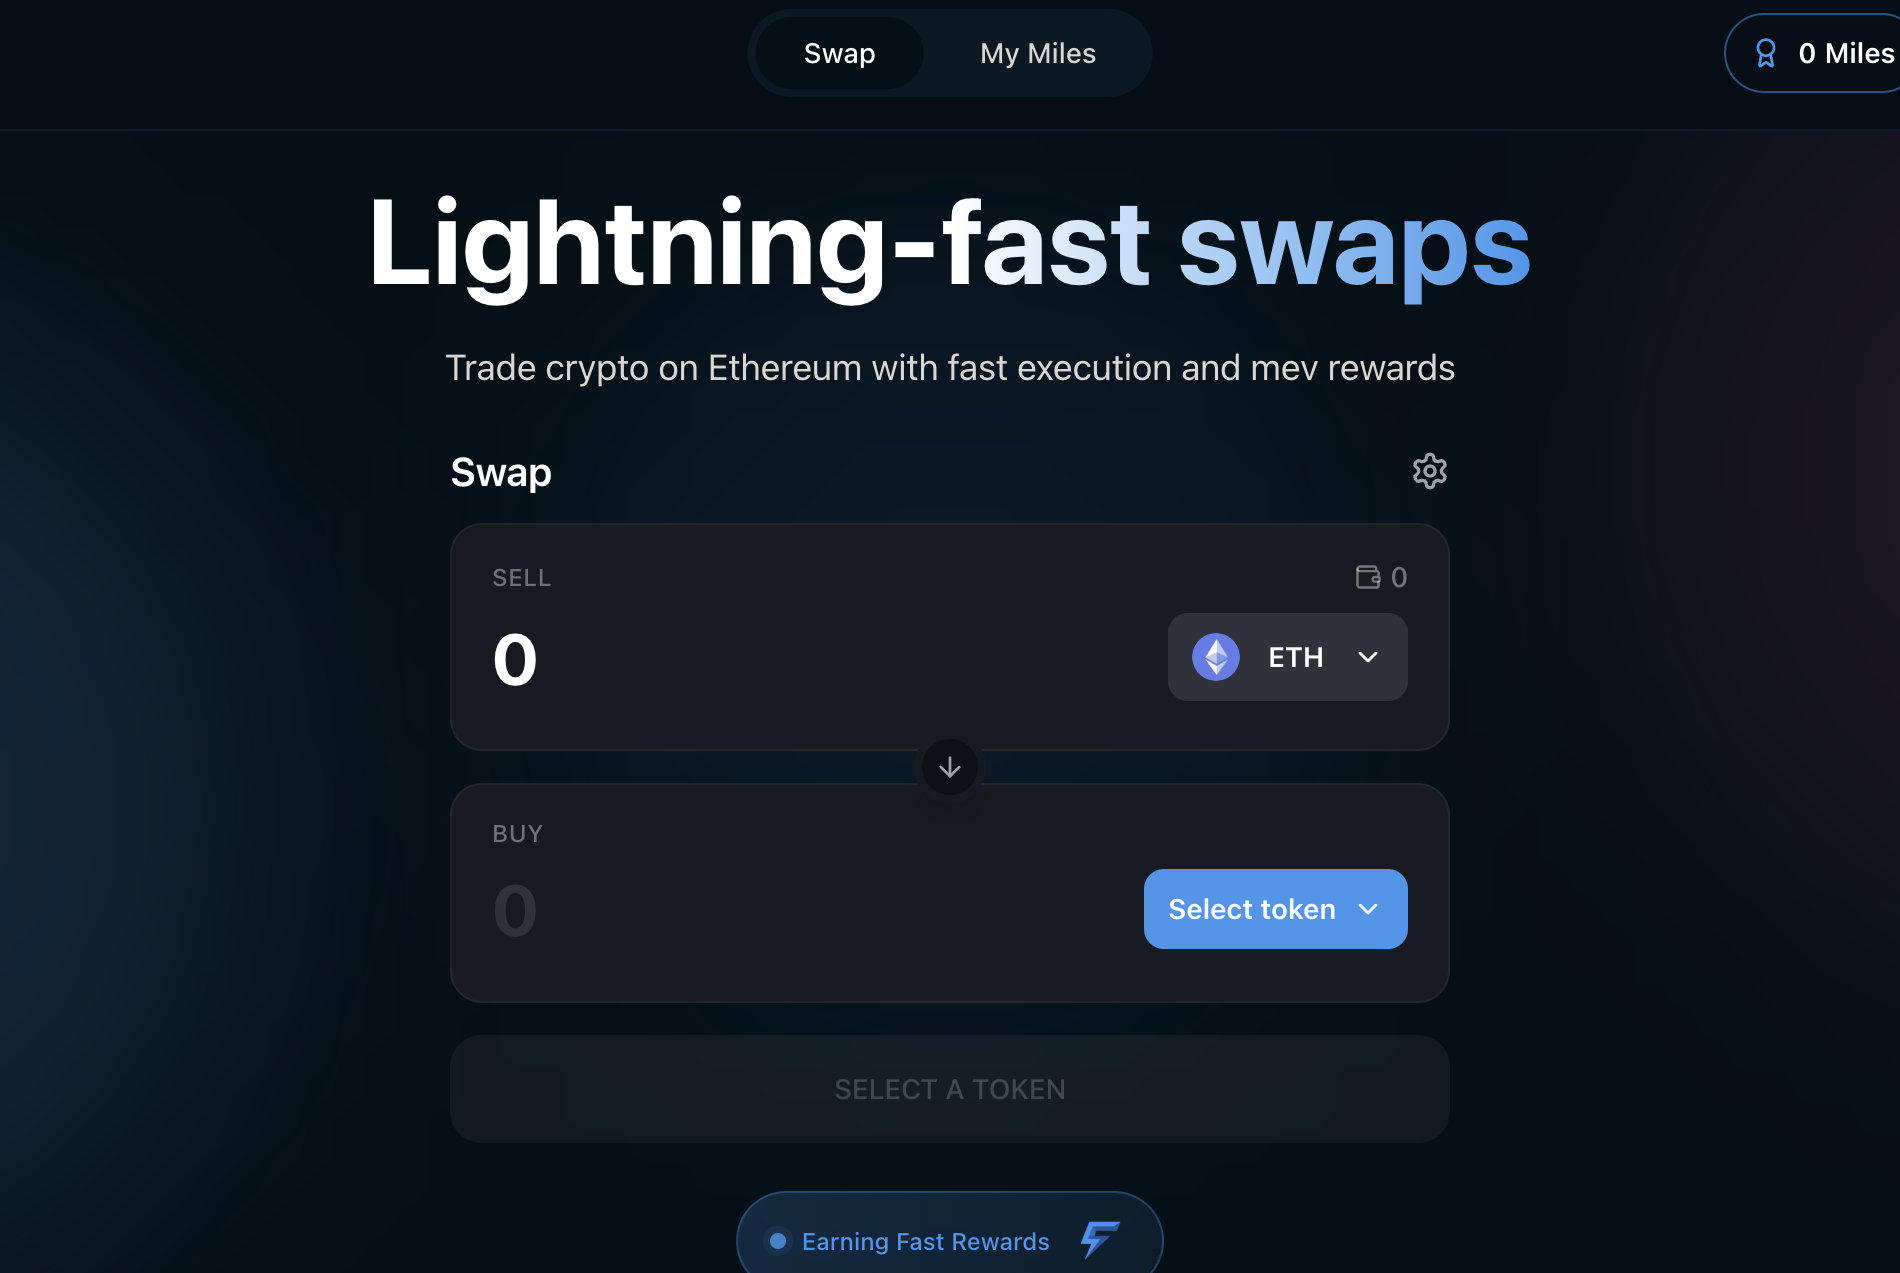
2
Connect Your Wallet
Click the Connect Wallet button in the top-right corner of the page.A wallet selection modal will appear. Choose your wallet provider:
- MetaMask
- Rabby
- WalletConnect (for mobile wallets or other providers)
3
Select the Token You Want to Sell
The swap interface has two sections: Sell (top) and Buy (bottom).Click the token selector dropdown in the Sell section. By default, it shows ETH.A token selector modal opens where you can:
- Search by token name, symbol, or contract address
- Browse popular tokens in the quick-select bar (ETH, DAI, USDT, WBTC)
- Add a custom token by pasting any ERC-20 contract address
4
Select the Token You Want to Buy
Click the token selector button in the Buy section and choose your desired output token. For this guide, we will select USDC.
5
Enter the Swap Amount
Click the amount field in the Sell section and type the amount you want to swap. For example, enter 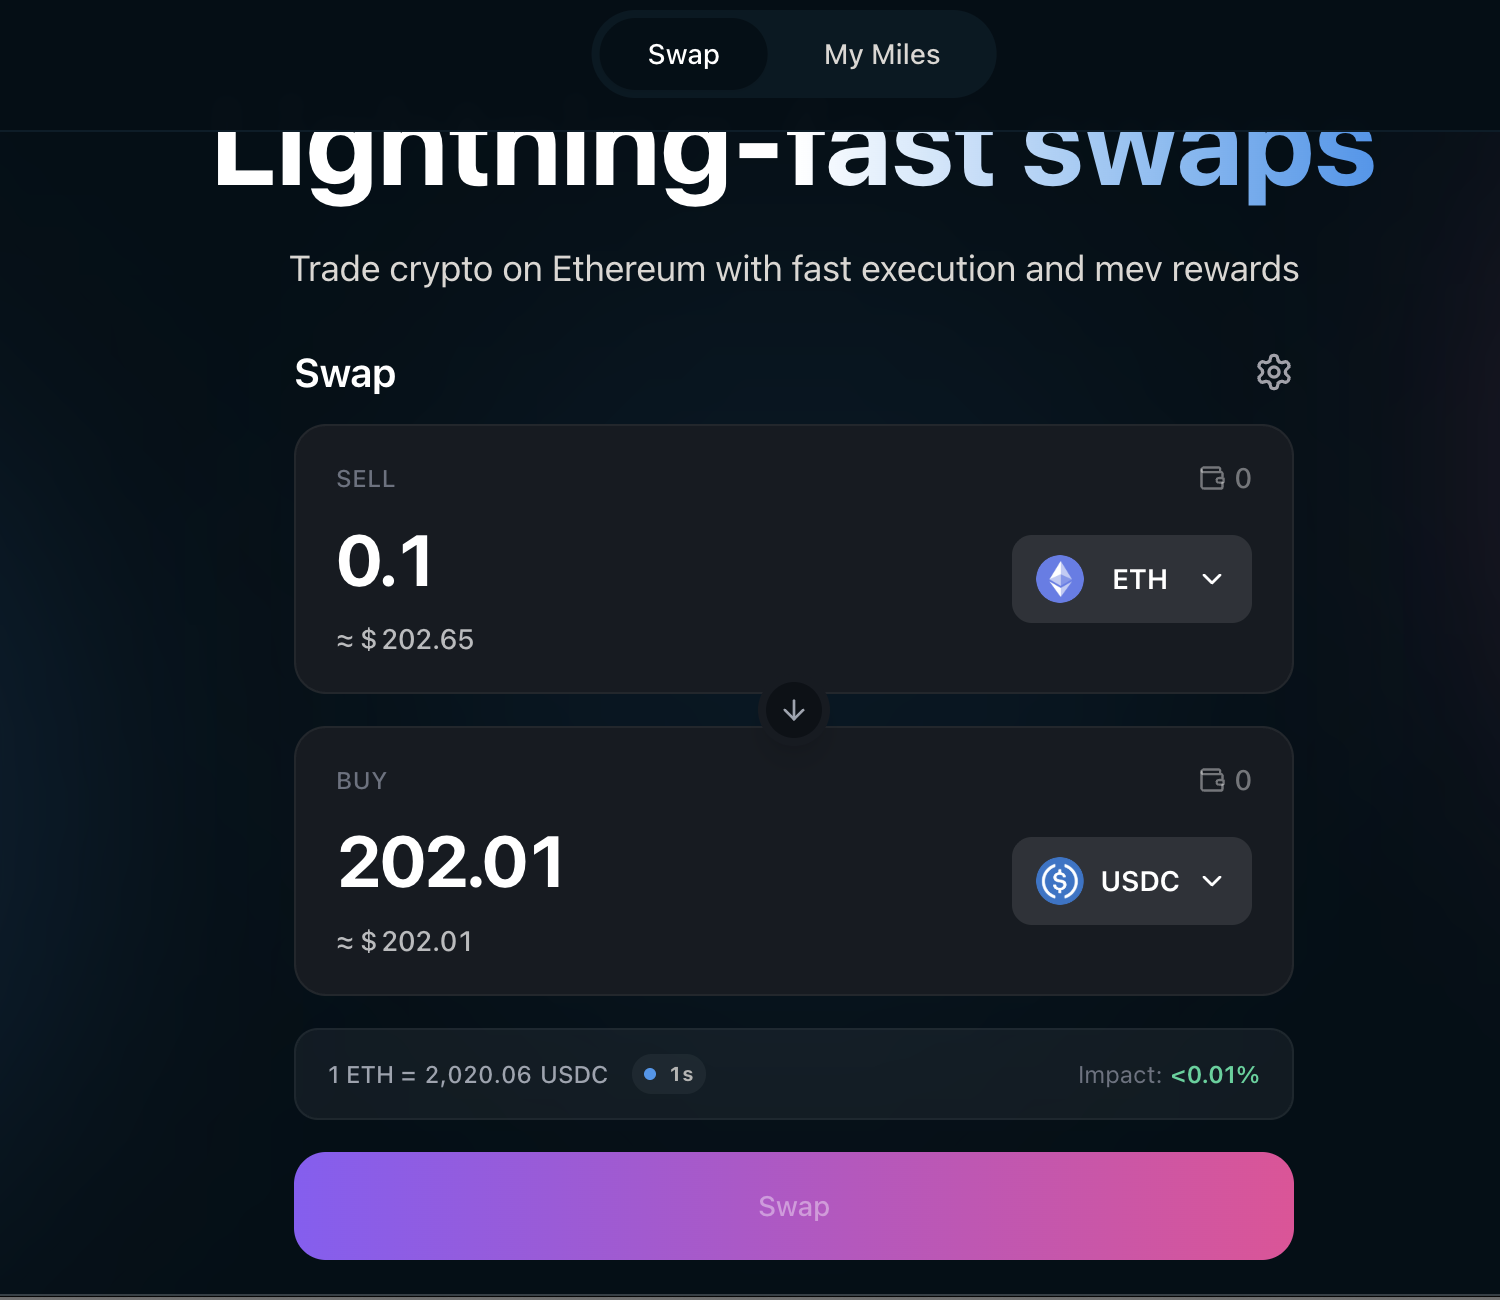
0.1 to swap 0.1 ETH.As you type, Fast Swaps automatically:- Fetches a real-time quote via a competitive solver auction
- Displays the output amount in the Buy section (with USD equivalent)
- Shows the exchange rate between the two tokens
- Shows price impact — the effect your trade has on the market price
6
Review Swap Details
Before confirming, review the swap details displayed below the Buy section: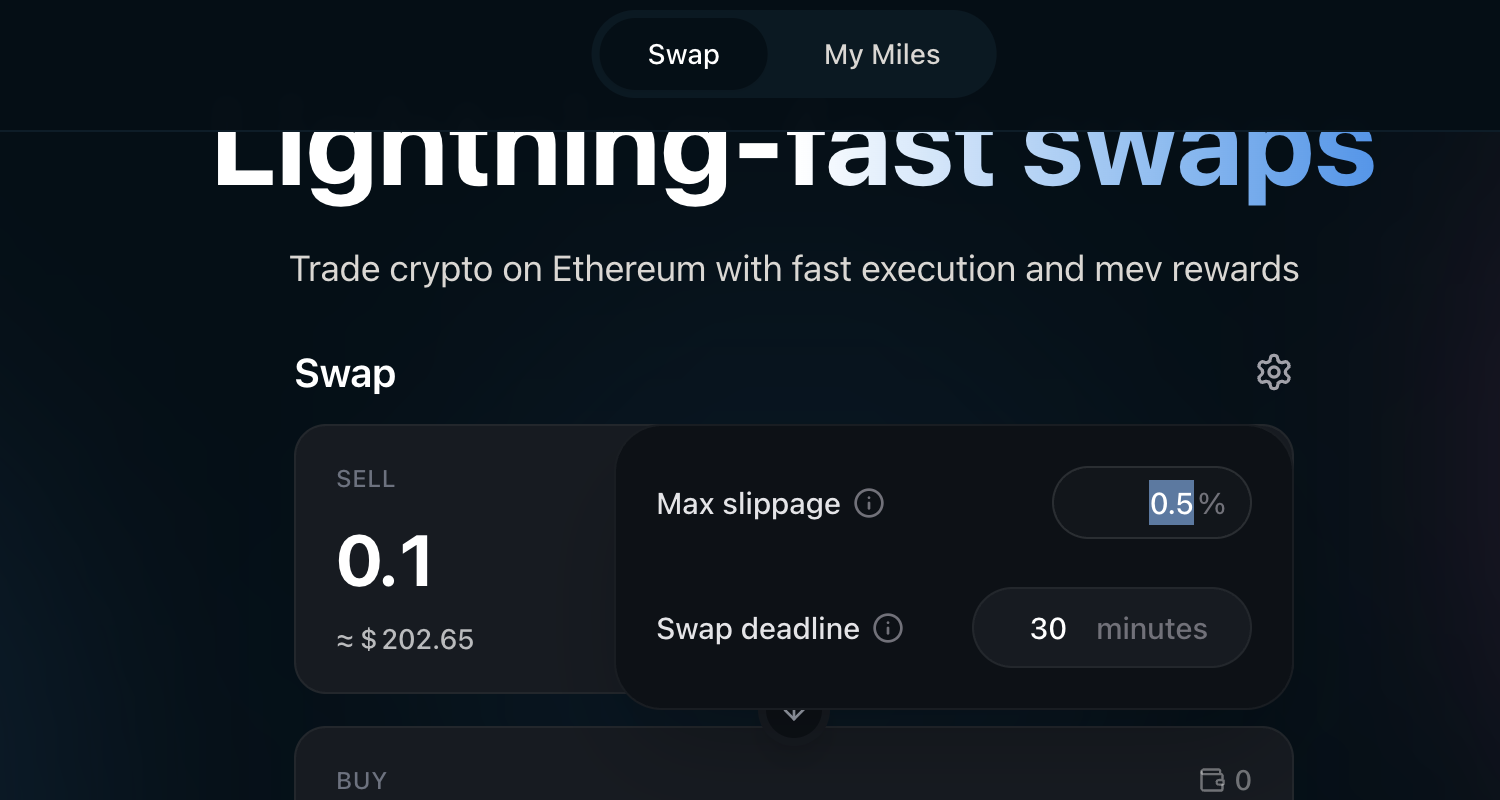
Adjust Settings (Optional)
Click the gear icon (⚙) next to the Swap heading to open settings. Here you can adjust:- Max slippage — The maximum price movement you are willing to accept (default: 0.5%). You can set a custom percentage.
- Swap deadline — How long (in minutes) the swap remains valid before it expires (default: 30 minutes).
7
Approve the Token (First Time Only)
This step only applies to ERC-20 token swaps (e.g., USDC → ETH). If you are swapping ETH as the input token, skip to the next step.
8
Confirm the Swap
Click the Swap button to initiate the swap.A confirmation modal appears showing the full details of your swap, including input and output amounts, the exchange rate, price impact, minimum received after slippage, and estimated gas cost.Review the details and click Confirm Swap.
9
Sign in Your Wallet
Your wallet will prompt you to sign the transaction:
- For ERC-20 input tokens: You will sign an EIP-712 message (a signature, not a transaction). This is gasless — you do not pay gas at this step.
- For ETH input: You will sign and submit an on-chain transaction. This requires gas.
10
Receive Preconfirmation
Within seconds of signing, your swap is preconfirmed. A confirmation toast appears at the bottom of the screen.Preconfirmed means Ethereum block builders on the mev-commit network have committed to including your swap in an upcoming block. This gives you near-instant confidence that your swap will settle — no need to wait for the full block to be produced.This is the core Fast Swaps experience: your swap feels instant.
What happens after preconfirmation?
What happens after preconfirmation?
After the preconfirmation, your swap progresses to full on-chain confirmation in the background. The toast will update once the swap is included in a finalized Ethereum block. You do not need to wait for this — the preconfirmation is your signal that the swap is done.
11
Swap Complete
Once fully confirmed on-chain, the toast updates with a link to the transaction on Etherscan.Your output tokens are now in your wallet. The swap form resets, ready for your next trade.You will see an Earning Fast Rewards indicator below the swap card — this confirms you are accumulating Fast Miles. Check your miles balance from the My Miles tab in the top navigation.
Earn Fast Miles
Every swap you make on Fast Swaps earns Fast Miles — mev rewards proportional to the value your swaps generate through Fast Protocol. The more you swap, the more miles you earn. Users receive at least 90% of the mev their transactions generate. Click My Miles in the top navigation bar to view your miles balance and swap history.View Dashboard
Check your Fast Miles balance, swap history, and leaderboard position.
Leaderboard
See how you rank against other Fast Swaps users.
Tips & Troubleshooting
My swap is taking a long time
My swap is taking a long time
Ethereum block times are approximately 12 seconds. Most swaps are preconfirmed within seconds and fully confirmed within 1-2 blocks (12-24 seconds). If a swap takes longer:
- Check your wallet for any pending transactions
- The swap may be waiting for a mev-commit opted-in proposer — see FAST RPC for details
- If the swap times out (exceeds your deadline), it will automatically cancel and your tokens will remain in your wallet
My swap failed — what happened?
My swap failed — what happened?
Common reasons for swap failure:
- Slippage exceeded — The price moved more than your max slippage setting between quote and execution. Try increasing slippage via the gear icon (⚙).
- Insufficient balance — Make sure you have enough of the input token plus ETH for gas (if swapping ETH).
- Deadline expired — The swap was not executed before the swap deadline. Try again with a fresh quote.
- Price impact too high — For large swaps, try splitting into smaller amounts.
Can I swap any token?
Can I swap any token?
Do I need ETH for gas?
Do I need ETH for gas?
- Swapping ERC-20 tokens (e.g., USDC → ETH): After the initial one-time Permit2 approval, subsequent swaps are gasless — you only sign a message.
- Swapping ETH (e.g., ETH → USDC): You submit an on-chain transaction and pay standard Ethereum gas fees.
- First-time token approval: The one-time Permit2 approval requires a small amount of ETH for gas.
What’s Next?
How Fast Swaps Works
Learn about the technical architecture, smart contracts, and mev reward mechanics behind Fast Swaps.
Fast Protocol Economics
Understand how mev is captured, distributed, and why users receive at least 90% of the mev their transactions generate.
FAST RPC
Learn about the FAST RPC that powers preconfirmations and mev capture for Fast Swaps.
What are Fast Swaps?
Quick FAQ on Fast Swaps fundamentals.